Google+ StrebeDesigns: #PCAGOE
Showing posts with label #PCAGOE. Show all posts

Saturday, August 20, 2016

Polymer Clay Artists Guild of Etsy (PCAGOE): August 2016 Challenge winners "Seaside"

Thanks to my fellow members for placing my Bathing Beauty in second place.


Polymer Clay Artists Guild of Etsy (PCAGOE): August 2016 Challenge winners "Seaside": Top entries selected by the public 1.   Sophisticated Seahorse Aquatic Writing Journal  by Theresa of  TheClayMonet 2.   L...

Sunday, July 10, 2016

Polymer Clay Artists Guild of Etsy (PCAGOE): July 2016 Challenge winners "Music"

Polymer Clay Artists Guild of Etsy (PCAGOE): July 2016 Challenge winners "Music": Top entries selected by the public 1.   Sound Wave Flute  by Beth of  CreateMyWorldDesigns    2.   Music is my Second Langua...

Sound Wave Flute by Beth of CreateMyWorldDesigns


Music is my Second Language Mixed Media by Arlene of HarrisonHollow


Song Birds - Nature's Music by Betsy of StrebeDesigns 

Many thanks to everyone who voted, your support is always much appreciated. The members and the public were really in sync this time. The same artists took the same places in both groups!


Thursday, March 24, 2016

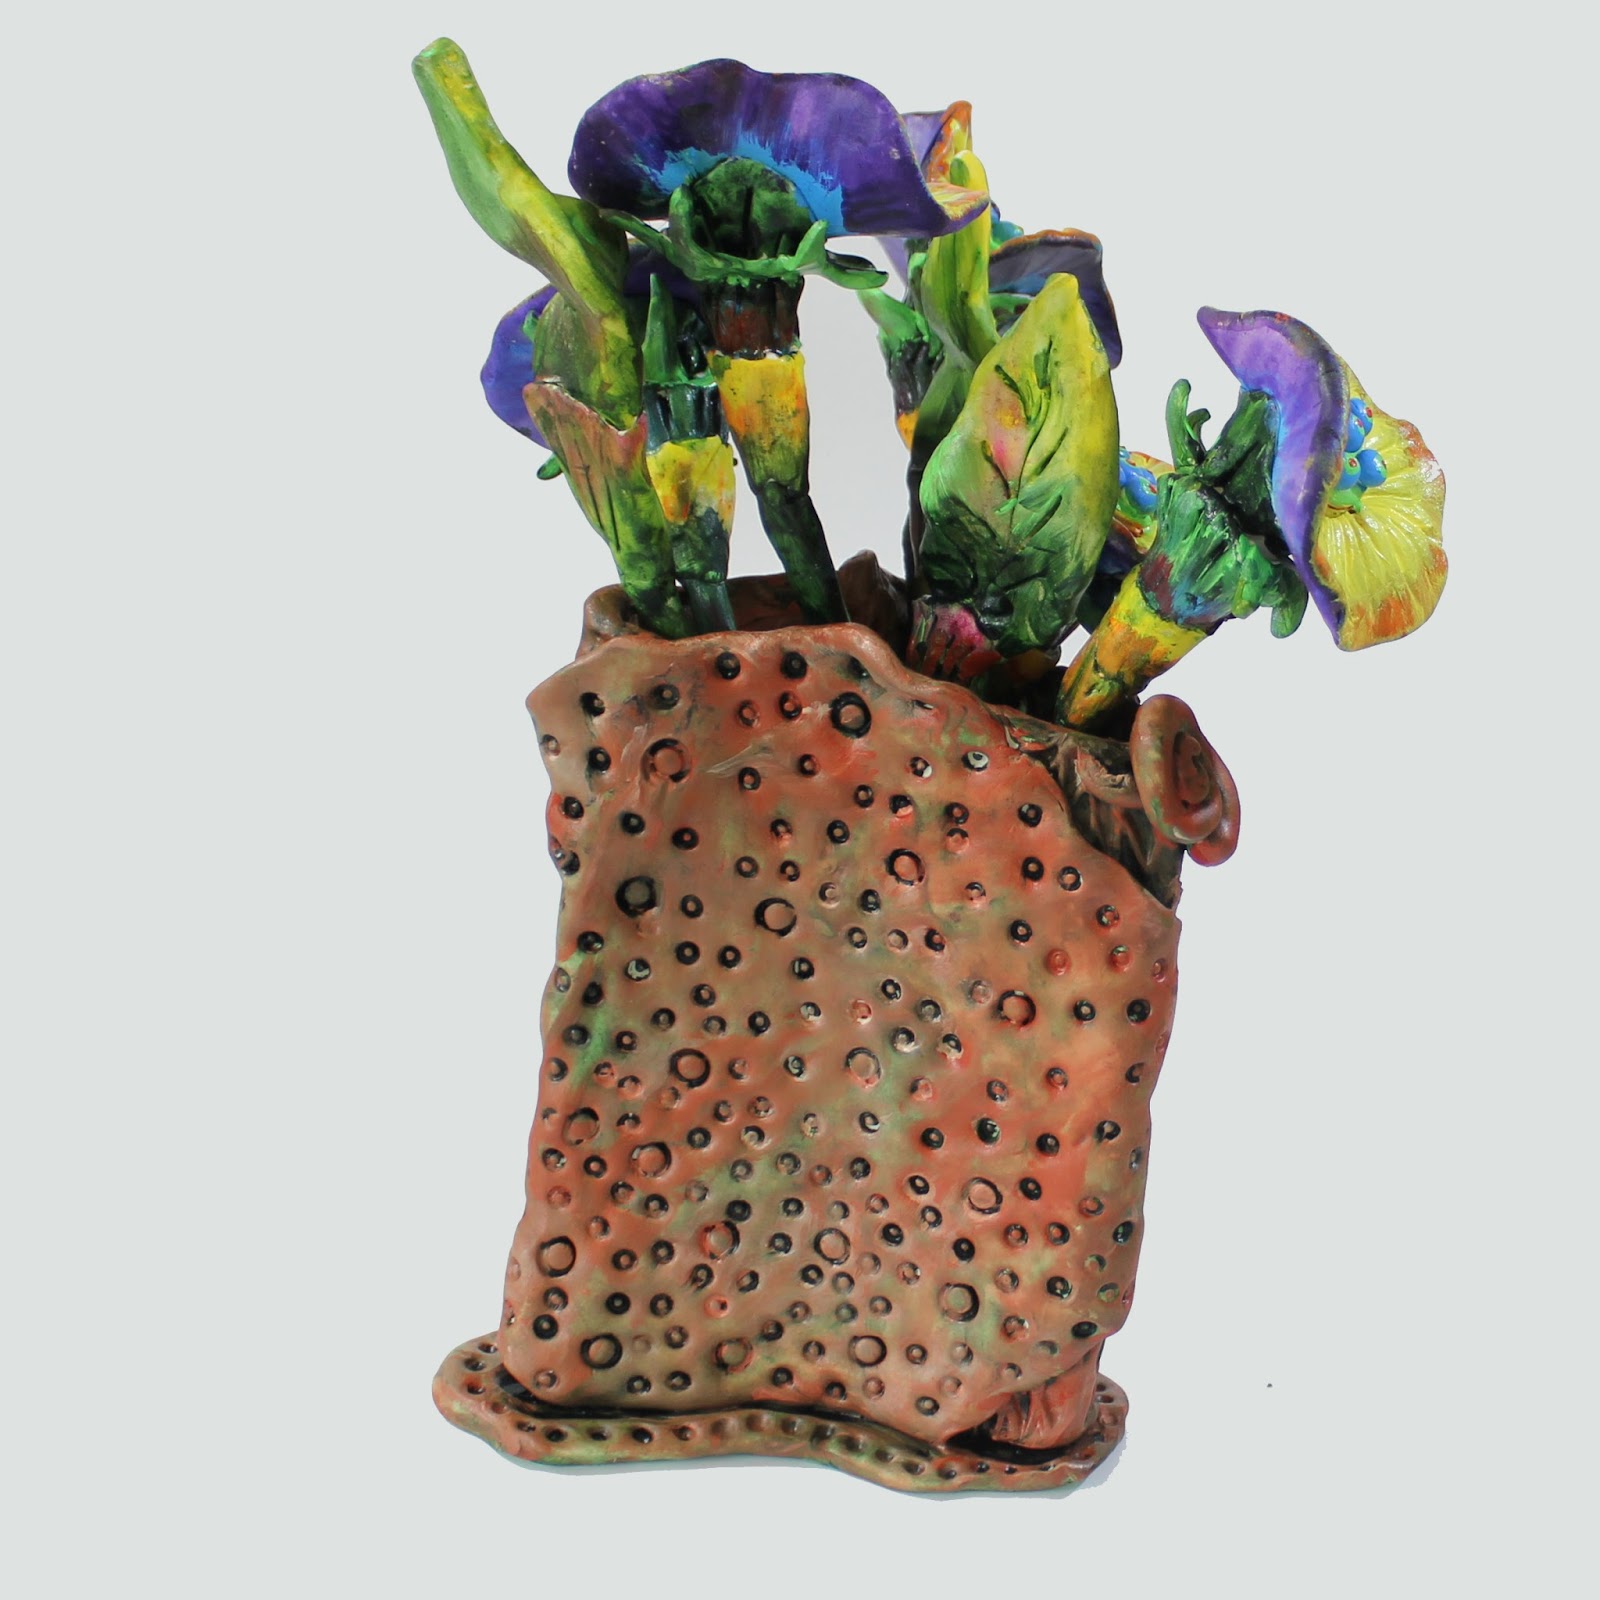
Whimsical Flowers and Vase


In the past year I have come to know the work of several polymer clay mixed media artists.  I am drawn to their work because they produce color in their pieces with paint, ink, metallic, powders, chalk, etc. rather than using the colors of polymer clay.  Additionally they introduce other elements such as boxes, tins and alters.  Since I have painted in acrylics for over thirty years, I have a deep passion for what can be accomplished with paint.  Given my recent passion for polymer clay it just seemed like it was bound to happen for me - combining polymer clay and acrylic paint.

Some of my favorite polymer clay mixed media artists are Laurie Mika, Doreen Kassel, Donna Greenberg and Lisa Renner.  Be sure to visit their websites to see their incredible art pieces.

So when the time came to create an entry for the Polymer Clay Artists Guild of Etsy (PCAGOE) April challenge "Flowers", I knew right away I would sculpt and paint flowers, leaves and a vase.  Inspired by all the artists mentioned and my total ignorance when it comes to real flowers (not to mention my inability to create them) my entry "Whimsical Flowers and Vase" came about. The flowers and leaves are strictly from my imagination, as far a I know flowers like these do not exist.

The arrangement is made from sculpted Sculpey Ultralight polymer clay and painted with artist's grade acrylic paints.  It stands about 11" tall, and the flowers and leaves are removable for rearranging.

The process: 

I made the flowers and leaves first without the stems, since the stems would be clay wrapped around wire. I also made several pods, but it turned out the vase was too small to hold everything, so I opted to leave them out.   They looked a little like a boneyard at this point!


Stems attached and ready for painting.  Some of the leaves and all of the pods are put aside for another day.


Testing my color choices on a leaf - and setting up to paint.  The most messy and most fun part!


Flowers and leaves painted.  I decided the flat centers were just too boring, so I added little balls to add some fun and depth.  After much noodling, I decided to give an antique terracotta look to the vase.  I had the perfect colors, Venetian red and titan buff, to mix in different amounts to vary the terracotta colors.


But first! A layer of deep hooker green to lend to the aging look. 


More Views: The vase is three sided, here are the other two sides.  


Thank you for visiting my blog.  Your comments are always much appreciated.


Wednesday, March 9, 2016

Polymer Clay Artists Guild of Etsy (PCAGOE): March 2016 Challenge winners "Rings"

Thank you to my fellow members for voting my Blooming Ring in first place.  It means a lot.  Follow the link below to see all the winners, congratulations to all.


Polymer Clay Artists Guild of Etsy (PCAGOE): March 2016 Challenge winners "Rings": Top entries selected by the public: 1.   Bold Orange Ring   by Jackie of  ThePleasantPheasant 2.   Blue Millefiori Napkin Rin...

Thursday, February 25, 2016

Fun for Summer - A Blooming Ring


The theme for the March Polymer Clay Artists Guild of Etsy (PCAGOE) is rings.  I decided if I made one, it was going to be colorful and whimsical! I had been working with !Premo color Opal and it was messy but produced beautiful results.  For more transparency I blended it with Pardo Translucent.  I dyed the clay with alcohol inks which I knew would give it bright colors.  

The layers were baked individually and then combined with glue. I used 2 loops of finger-size memory wire for the band.    


More Views:


Thank you for stopping by!  Comments are always welcomed and appreciated.


Monday, January 25, 2016

Japanese Seasons Tool Holder


(click on images for a closer look) 

The February theme for the Polymer Clay Artists Guild of Etsy (PACAGOE) monthly challenge is the Four Seasons.  The piece Japanese Seasons came about as a result of two factors.  Firstly, I am continuing to make fun polymer clay tool holders for my work area so I decided to make one following the challenge theme.  Secondly, my family and I are traveling to Japan this summer and we are devouring information on the country, culture, and a little bit of the language. This gave me the idea to make a tool holder in somewhat of a Asian/Japanese style and display the four seasons in Japanese. So turning to Google Translation, I came up with four characters in Kanji to use on my tool holder.


Now on to build a tool holder with a little Japanese influence. I decided on a temple tower-like design, even though it would be an inefficient use of some of the space on the bottom.  I cut a cardboard template; rolled out the sides on which I stamped a pattern. After curing, I antiqued them with black artists grade acrylic paint. (A real messy job!)


Next I constructed a support, in the shape I wanted, from heavy duty construction paper.  Then I sealed the sides together with extruded lengths of a right-angle shape.  I cured at this point so it would hold its shape for other work to come.


Next building the "bamboo" facade to cover the corners. 


Well, I got so in the zone, I forgot to take any more photos! But I made the bottom from a thick and textured sheet of black clay, draped over a small square jewelry box lid to form the curve.  

I wish I could say I did the Kanji calligraphy, and I have been practicing, but I am not very good at it yet.  I was afraid that any small deviation of the characters could take the word in whole new (and possibly not desirable) direction.  :) These are printed out from the web on photo paper, and coated with artists grade acrylic gel medium.  They are mounted on black squares and trimmed with a black ribbon of extruded black clay.   After curing, I glued them to the sides. 

Pretty much the top trimming came about on its own.  I didn't really have a plan until it started to happen. 

Here it is, fitting in nicely with my other handmade tool containers. I decided to use it for all my small paintbrushes. 


Thank you for stopping by! Sayonara!

Sunday, October 25, 2015

Mini Box for Treasures


Well, this was truly a challenge! It turned out exactly as I envisioned, but OY! what a ride.  This little round trinket box is 2" high, and 2" wide.  Perfect for your purse or to use as a colorful fun decor item.  The process was long and tedious with lots of reworking, redoing, and rethinking.  I learned a lot, so hopefully next time will be lot smoother.

The beginning: Surface painted with Golden Gold acrylic paint.


Other colors come from Luminere Metalics, alcohol inks, Inka Gold, and chalk ink stamps.  The ginkgo leaf stamp is from Creative Journey Studios in Buford, GA. And more views: 


Thanks so much for stopping by!


Thursday, August 27, 2015

Very Cool Stuff tool container


I am really tired of looking at all the soup cans, peanut butter jars and other boring things that hold my crafting tools.  So I am on a mission to replace them one by one with arty, rustic polymer clay containers.  This one is my entry in the September PCAGOE challenge "Fun with ABCs" .  Since I have been putting corny/cute sayings on my containers, I figured why not use one as an entry.  I am really enjoying getting back to my artistic roots of painting with these newer pieces.  This is done with acrylic paint, alcohol inks, and chalk inks applied to a white polymer clay base.

This container is about 5 1/2" tall and holds some of my favorite tools.  Ball tools for sculpting and shaping, Christi Friesen tools, texture rollers and Sculpey Etch "n Pearl.  The container says "Very Cool Stuff" on the front and "Creative Zone" on the back. The sailboat comes from one one of my own stamps.  Sailboats are significant in my life; I sailed with my favorite uncle as a kid so the sailboat reminds me of him.  That makes this more special to look at while I am creating.

In progress view before the colors are applied.  You can see my toothpick holder and other sculpting tools containers (click on the photo for an enlarged view). These are made from ecru polymer clay and it is harder to get bright colors over tinted clay, but I do like the muted pastel-look you can achieve.


The back of the "Very Cool Stuff" container:


Another one just finished, for a smaller ball tools set:


My work area is getting cheerier every day!  
Thank you so much for stopping by.


Saturday, July 25, 2015

Fairy in a Bottle House


Fairy in a Bottle House is made of polymer clay over a sake bottle.  It is about 10" tall and is purely for fun.  It has no function but to make you smile.  Yet another piece of my work inspired by Lisa Renner's class in the Polymer Clay Adventure.

One word: WHEW!

I wasn't sure I was going to be able to participate in this month's PCAGOE challenge "Fairy Houses". And it was for a good reason.  We adopted this wonderful seven year old cat and made the choice to pack up my studio area in the guest room to make it her safe room, to keep her separated from our lovey home cat Gemma who is six.  But Heidi is worth the disruption, don't you think?


Her owner passed away and she ended up at the local shelter, which BTW, is a fabulous, caring, no-kill shelter.  Now, happily, she is ours.  She turned out to be such a well behaved young lady that I was able to unpack enough to make this entry. 

Oh, but I digress, this is about my fairy house. Well, I am going to digress a little more.  We love sushi and we love sake with our sushi.  One brand of sake we buy comes in these wonderful little slightly twisted three-sided bottles.  This photo shows one bottle uncovered, and the same kind of bottle covered with the beginnings of my fairy house.  The mesh wire is the form for the roof.


After completing the fairy house in clay and curing, I applied a rich blue acrylic paint as the "antiquing" layer.  Next, ready for color ... my favorite part.  Away go the slicing blades and carving tools and out come the alcohol inks and chalk inks!


More views:


Thank you so much for stopping by! Would love to hear any comments on my very first Fairy House!