Google+ StrebeDesigns

Thursday, May 26, 2016

A Nightlight for Kim


I wanted to make a nightlight for my daughter who recently redid one of her bathrooms in blue and white.  Integrating this month's PCAGOE's challenge theme "Quilling" was the perfect way to build a light with a delicate design.

I didn't really have a specific design in mind, except that it had to incorporate blue and white. I also wanted to give a try at a curved shape for the shade rather than my traditional flat shape.  I started with Pardo translucent clay dyed with blue alcohol ink ... I didn't completely blend the ink into the clay giving the shade a slight marble look.  For the quilling arrangement I used light green, white, and yellow Premo Souffle polymer clay.  I also extruded a strip of coral, but ended up not using any of it, it took away the soft look I was after.


After cutting out a rectangle of the blue, I draped it over a can to cure.  After that cooled, I added a thin layer of translucent liquid polymer clay to hold the strips as I applied them to the shade.  I have never "quilled" polymer clay, and I can say there was a definite learning curve.  But I persevered and built the pieces of the arrangement many times.  

I am happy with the results, I think my daughter will be too! Here are off/on photos taken in one of my bathrooms.  


Now it goes in the mail! Thank you stopping by and letting me share a little of this project with you.


Tuesday, May 24, 2016

Polymer Clay Earring 101 Tutorial

So happy to have my second tutorial featured Artcademy! Thank you Beth Miller Petricoin for introducing me to Martiel Traczyk Beatty!

Click here for my Polymer Clay Earring 101 Tutorial!


Thursday, March 24, 2016

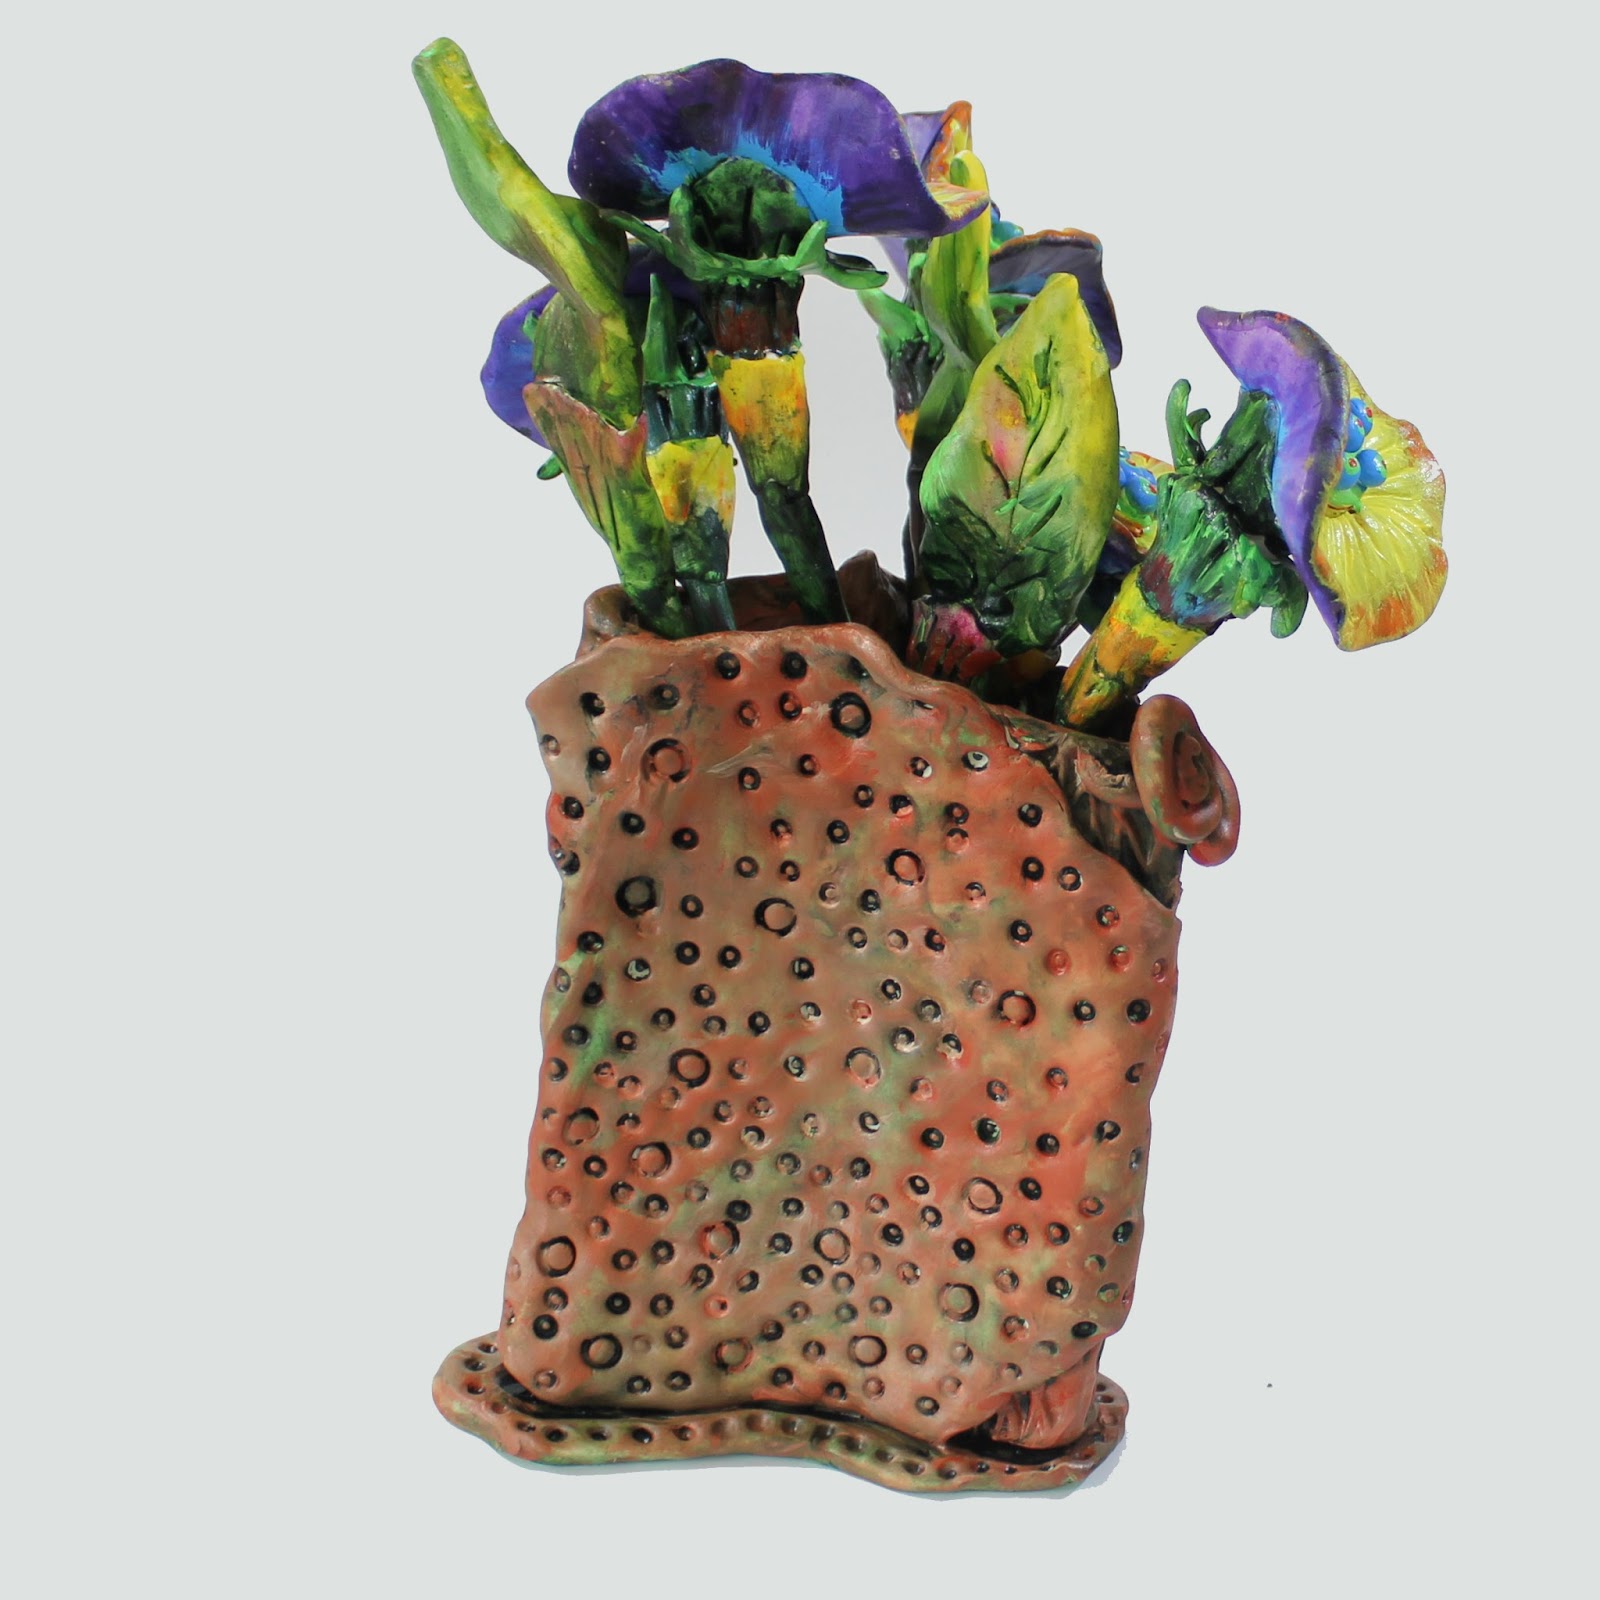
Whimsical Flowers and Vase


In the past year I have come to know the work of several polymer clay mixed media artists.  I am drawn to their work because they produce color in their pieces with paint, ink, metallic, powders, chalk, etc. rather than using the colors of polymer clay.  Additionally they introduce other elements such as boxes, tins and alters.  Since I have painted in acrylics for over thirty years, I have a deep passion for what can be accomplished with paint.  Given my recent passion for polymer clay it just seemed like it was bound to happen for me - combining polymer clay and acrylic paint.

Some of my favorite polymer clay mixed media artists are Laurie Mika, Doreen Kassel, Donna Greenberg and Lisa Renner.  Be sure to visit their websites to see their incredible art pieces.

So when the time came to create an entry for the Polymer Clay Artists Guild of Etsy (PCAGOE) April challenge "Flowers", I knew right away I would sculpt and paint flowers, leaves and a vase.  Inspired by all the artists mentioned and my total ignorance when it comes to real flowers (not to mention my inability to create them) my entry "Whimsical Flowers and Vase" came about. The flowers and leaves are strictly from my imagination, as far a I know flowers like these do not exist.

The arrangement is made from sculpted Sculpey Ultralight polymer clay and painted with artist's grade acrylic paints.  It stands about 11" tall, and the flowers and leaves are removable for rearranging.

The process: 

I made the flowers and leaves first without the stems, since the stems would be clay wrapped around wire. I also made several pods, but it turned out the vase was too small to hold everything, so I opted to leave them out.   They looked a little like a boneyard at this point!


Stems attached and ready for painting.  Some of the leaves and all of the pods are put aside for another day.


Testing my color choices on a leaf - and setting up to paint.  The most messy and most fun part!


Flowers and leaves painted.  I decided the flat centers were just too boring, so I added little balls to add some fun and depth.  After much noodling, I decided to give an antique terracotta look to the vase.  I had the perfect colors, Venetian red and titan buff, to mix in different amounts to vary the terracotta colors.


But first! A layer of deep hooker green to lend to the aging look. 


More Views: The vase is three sided, here are the other two sides.  


Thank you for visiting my blog.  Your comments are always much appreciated.