These are very basic instructions for making a three-part tool container with polymer clay. They assume a knowledge of conditioning clay and working with an extruder. I hope you have fun, and use these steps to apply to your own style and techniques. The surface and trim can vary in many, many ways. A gallery is shown at the end with some ideas to get your creative juices flowing. Feel free to share and sell your work made from this tutorial. A reference would be nice tho!
Supply List:
3 toilet paper rolls
Aluminum Foil
7-10 oz. Polymer Clay - a firmer brand like !Premo
Viva Inka Gold paints (optional)
Bake and Bond or Liquid Polymer Clay
Sewing Thread or String
Tape - Like Scotch Brand
Tools:
Pasta Machine
Tissue Blade
Extruder
Craft Knife
Tool for sealing raw clay seams - I use Christi Friesen's
Gotta Have It tool.
Tool for dimpling the clay (optional)
Cut three toilet paper rolls to the desired height. I left one roll at the full length (approximately 4 1/2") and cut the other two at 4" and 3" heights. Cover each roll tightly with aluminum foil, folding the foil into the ends of the rolls. Tape the seams.
Condition and cut sheets of polymer clay to cover each roll. It will take 5 1/2" to wrap around the toilet paper roll. So your sheets should be 5 1/2" x (the height of your cut rolls). In this case the three sheets are 5 1/2" x 4 1/2", 5 1/2" x 4", and 5 1/2" x 3". I rolled these sheets at #1 setting on my Atlas pasta machine starting at #0. Here I painted each black sheet with Viva Inka Gold paints and let dry.
Cover each roll with the prepared sheets. Seal your seams tightly to make sure the seams close on the inside. I love Christi Friesen's
Gotta Have It tool to seal seams.
Cure the rolls according to your brand of clay's instructions. Let cool and unfold aluminum foil from the inside of the toilet paper rolls. Twist the toilet paper roll inside the aluminum foil until it comes loose and can be removed. Set the toilet paper rolls aside for next time. Remove the foil from inside the cured cylinders.
Line up the three cylinders for connecting. On the tallest cylinder I place the seam to the back, on the other two I place the seam towards the middle touching the others.
Note (or mark on rim) where the three touch. Apply Bake and Bond to the touching points of all three.
Press the three together and tie tightly with thread or string. (sorry my only thread is dark and is hard to see). I wrap the thread around about three times and tie a knot making sure the containers are lined up correctly. Cure again for about 20 minutes.
When cured, remove the thread and proceed to make the bottom. Roll a sheet of clay, on the thickest setting of your pasta machine. Fold over for a double thickness. The sheet should be large enough to cover the entire bottom with some excess around the rim.
Cut off excess clay, and press the cylinders into the bottom to form an imprint of the cylinders in the clay.
Remove the cylinders from the bottom.
Fill the imprint with Bake and Bond.
Place the cylinders back on the bottom, lining up with the imprint. With a tissue blade, trim the clay flush with the sides of the containers. Hold blade straight up so the cut edge is on the same plane as the cylinders.
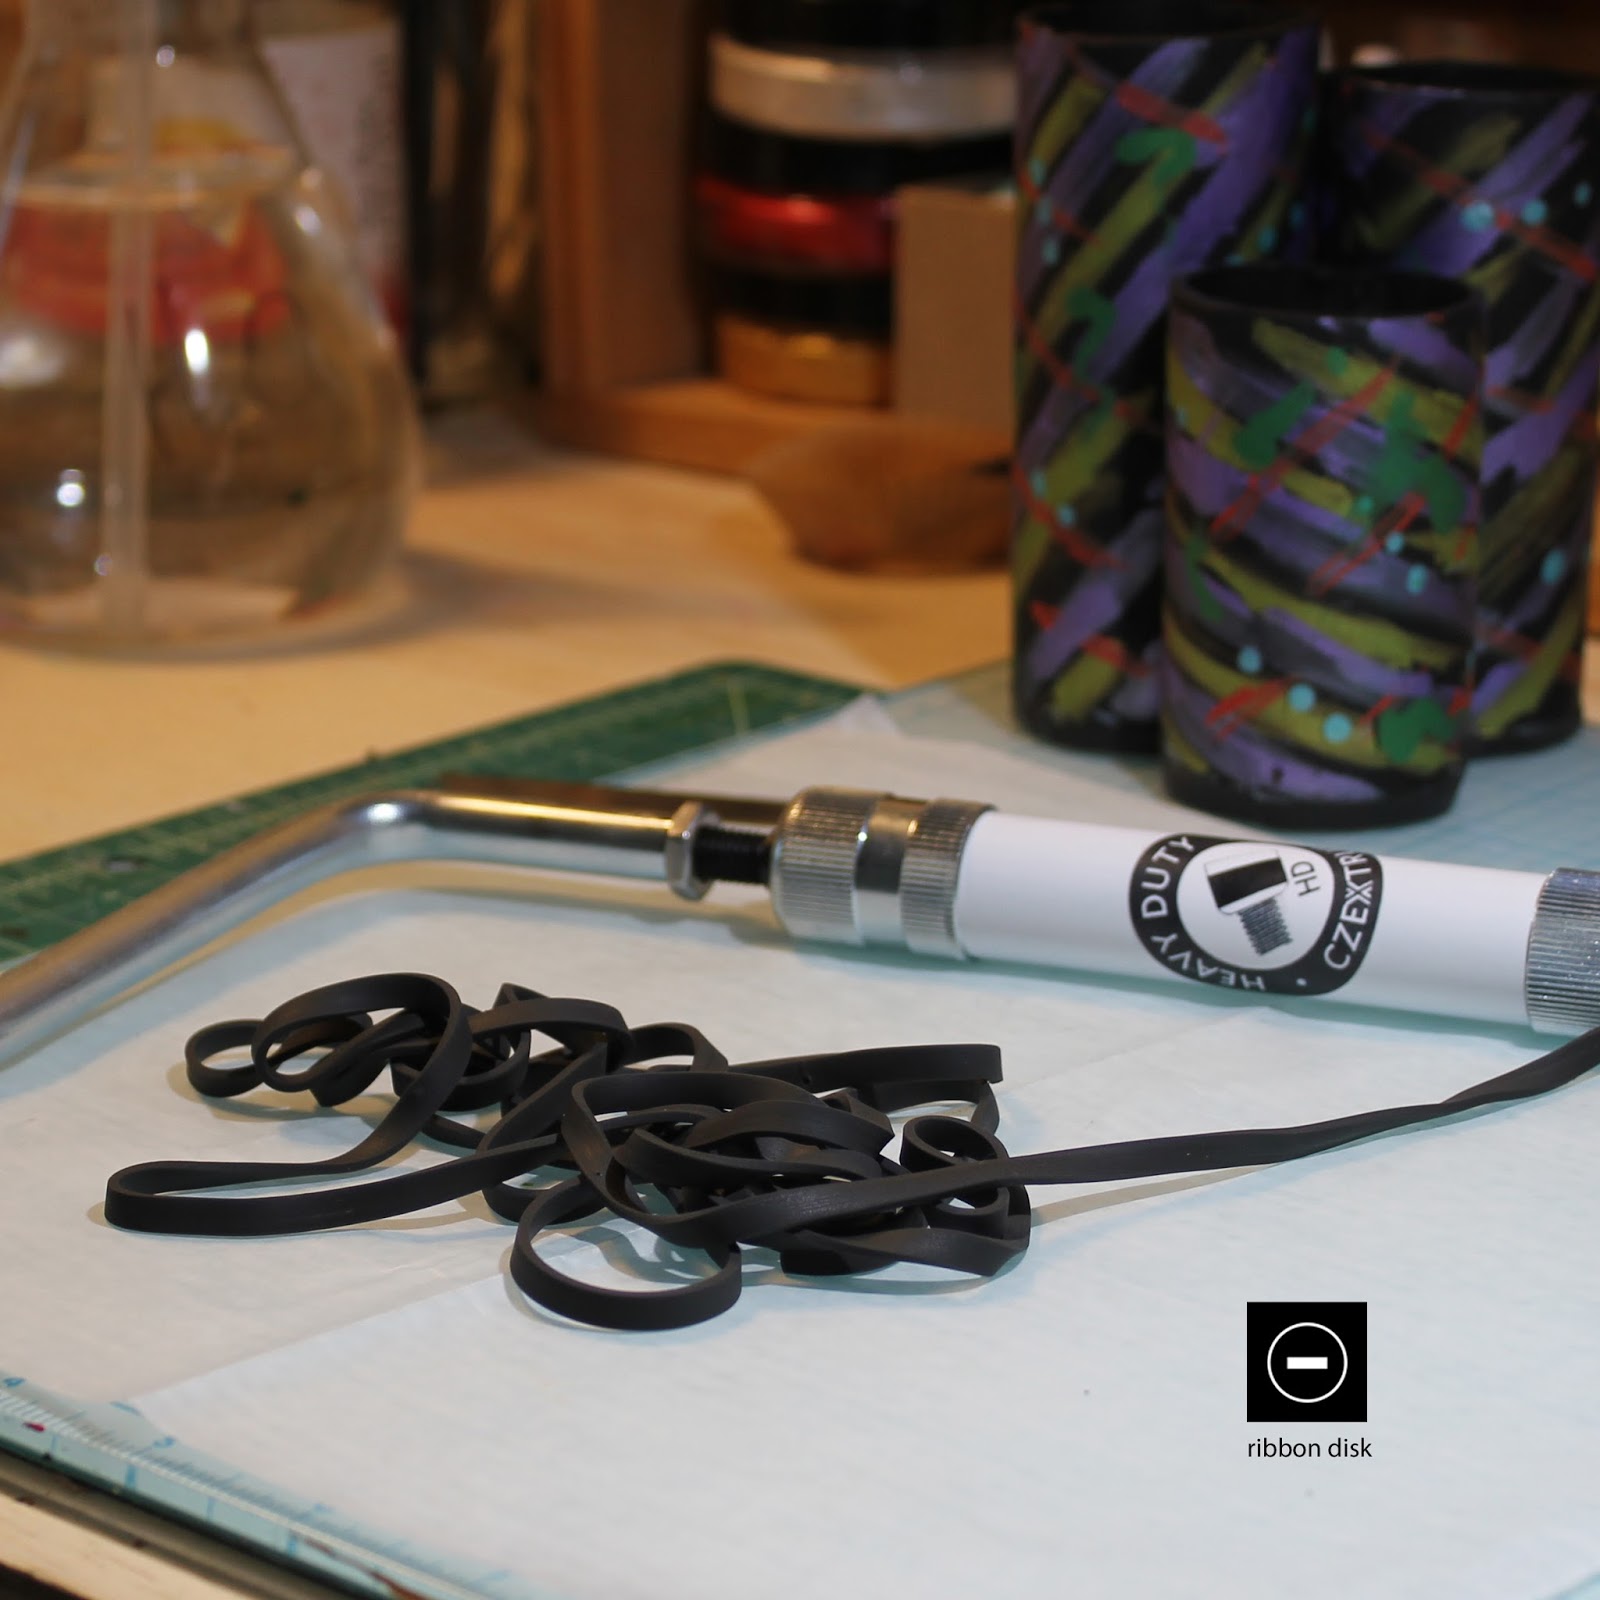
For the trim, extrude a long length of clay, using the ribbon disk (shape shown in photo).
Wrap the ribbon around the sides of the bottom of the cylinders, pressing into the intersections with your seam sealing tool.
For fun I added dimples to the ribbon on the bottom.
Apply Bake and Bond to the top edge of the cylinder (I find starting with the shortest works out the best).
Apply ribbon to the top of the edge over the Bake and Bond. Optionally press dimples here too.
Do the same steps for the remaining cylinders. And Cure for at least 30 minutes.
Cured, and ready for a little bling. I painted more Viva Inka Gold to the bottom and top ribbons and added a few jewels.
Tool Organizer put to work.
More organizers, the Gallery
 |
| One shelf in my work area - lots of learning mistakes, but they work! |
 |
| Here I used original Sculpey - not a good idea. It cracked in half during the first cure. Extruded ribbon came to the rescue to hold the pieces together. This is white clay, colored with alcohol and chalk inks. |
 |
| Three colors and three patterns from silkscreens. (silkscreens by Helen Breil and Tonja Lenderman) |
 |
| Same silkscreen pattern, different colors. (silkscreen by Tonja Lenderman) |
 |
| Same color of clay, different colors of metallic ink, different silkscreen patterns. (silkscreens by Helen Breil) |
 |
| Retro cane pattern with emblem. For this I did the cylinders in two layers, a base layer made of scrap clay. Then I applied a thin veneer of the retro cane pattern to the base layer before wrapping the toilet paper rolls. |
 |
| My very first (and largest) tool container. The sailboat on water is my own stamp design. |
Please post any questions or feedback in the comments section. Also I would love to see photos of what you create! Enjoy!